


I did not author this article - merely ensured it will never be removed from the internet - it is so well written. Published with permission. Original can be found here. http://mybsabantam.weebly.com/fork-springs.html
1.Remove the spring assembly
Prise out the two chrome-plated top nut caps (90-5255) and put them to one side.
For this job,I did not find it necessary to disturb the two shafts (stanchions), so leave the large chrome nut well alone.
Then, using a suitable socket (I used one I'd ground downspecially as there's not clearance) undo the top nuts (42-0101) and remove them.
The spring assembly should now just fall away from the top and hang, held in place by the oil seal collars.
2.Separate the spring assembly from the shafts
Before you can separate the spring assemblies from the shafts, it's necessary to undo the two screwed collars (90-5246) containing the oil seals.
Mine undid fairly easily, although three hands are better than two!
However, if all else fails, it may be necessary to remove the stanchions as well (by undoing the two large top nuts (90-5251 and bottom yolk pinch bolts (21-5672). It may also be necessary to help break the seal in the yolk by tapping the large top nuts before removing them altogether (small hammer though!).
If you're successful - as I was - this will leave the screwed collars, upper and lower bushes (90-5230 & 90-5229) still on the shafts, whilst the spring assemblies will have been separated, although still joined to the fork sliding tubes (90-5232 & 90-5235) by the restrictor rods (90-5249)

3.Dismantle spring assembly
After draining the oil out of the tubes, grasp the springs and rotate anti-clockwise to undo the restrictor rods from the inside of the tubes.
It will be necessary to hold the spring assembly securely in a vice, as you will need to unscrew the spring anchorage (90-5244) from the top end and the restrictor rod (90-5249) from the bottom end of the spring.
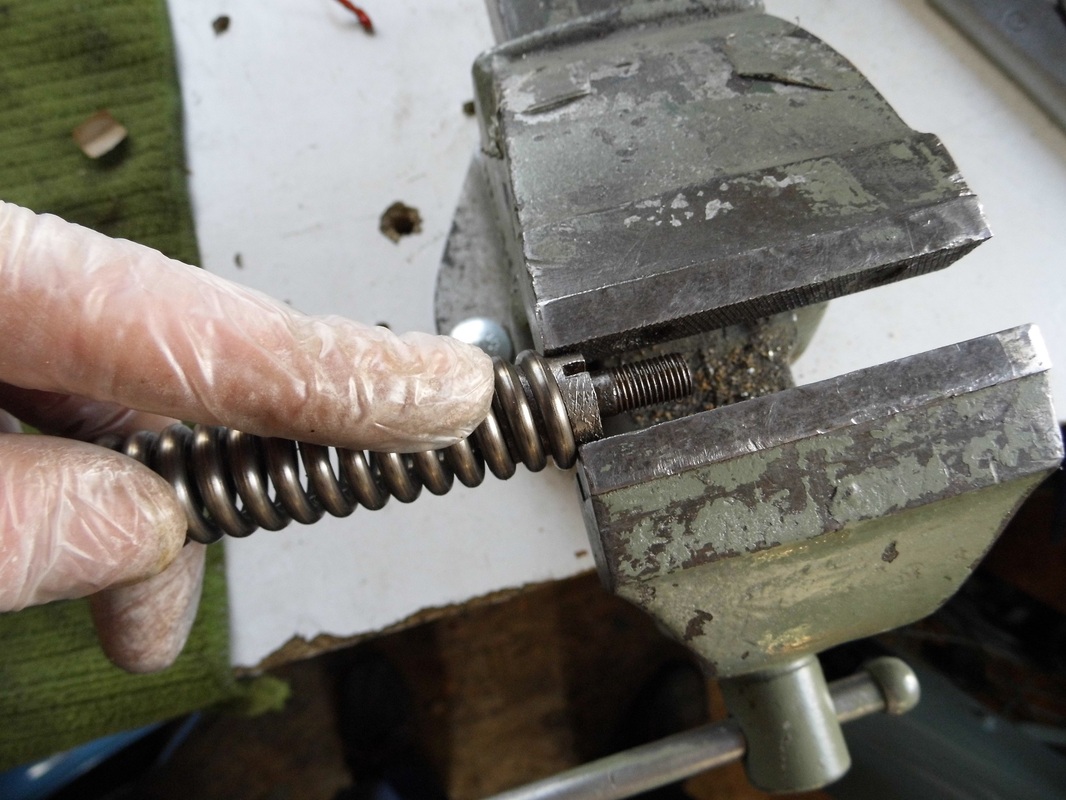
Both of these components can prove quite stubborn to undo and a degree of force will be required!
I found my mole wrench came in handy, although I had to get them started using a suitable drift and tapping gently with a small hammer!
The same will apply when refitting to the new springs.
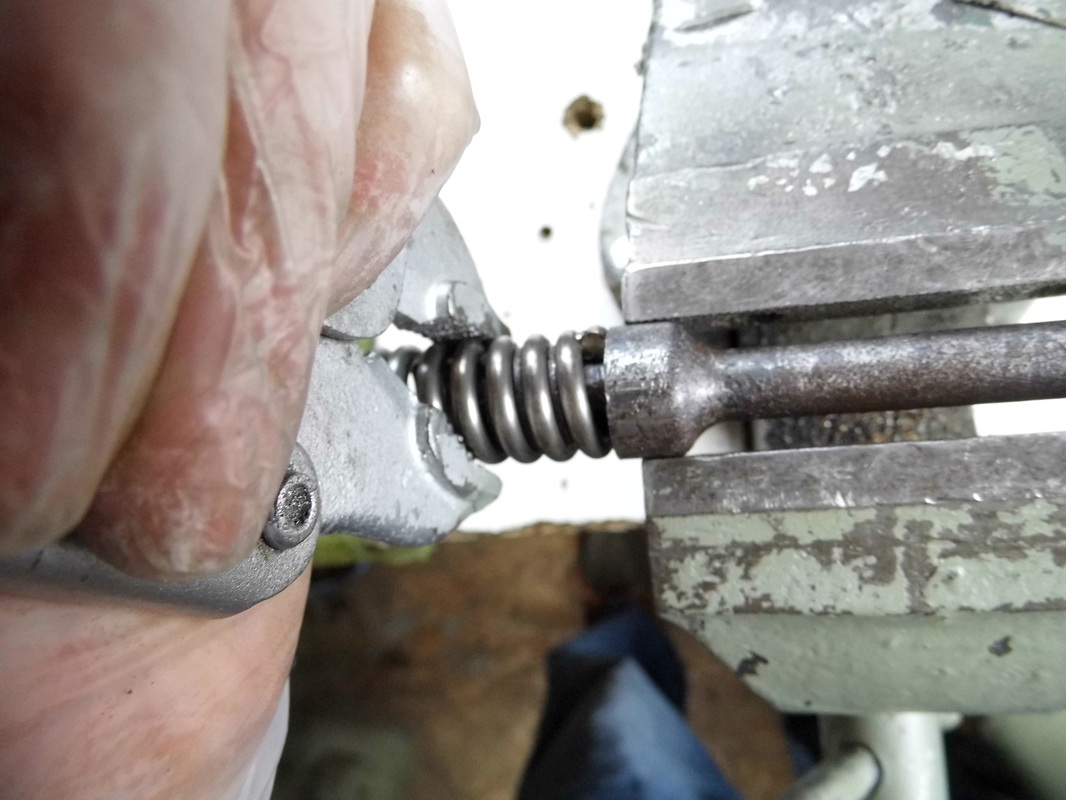
Please note: the new springs do not come with the anchorage or restrictor rods attached!
4.This is what you're left with
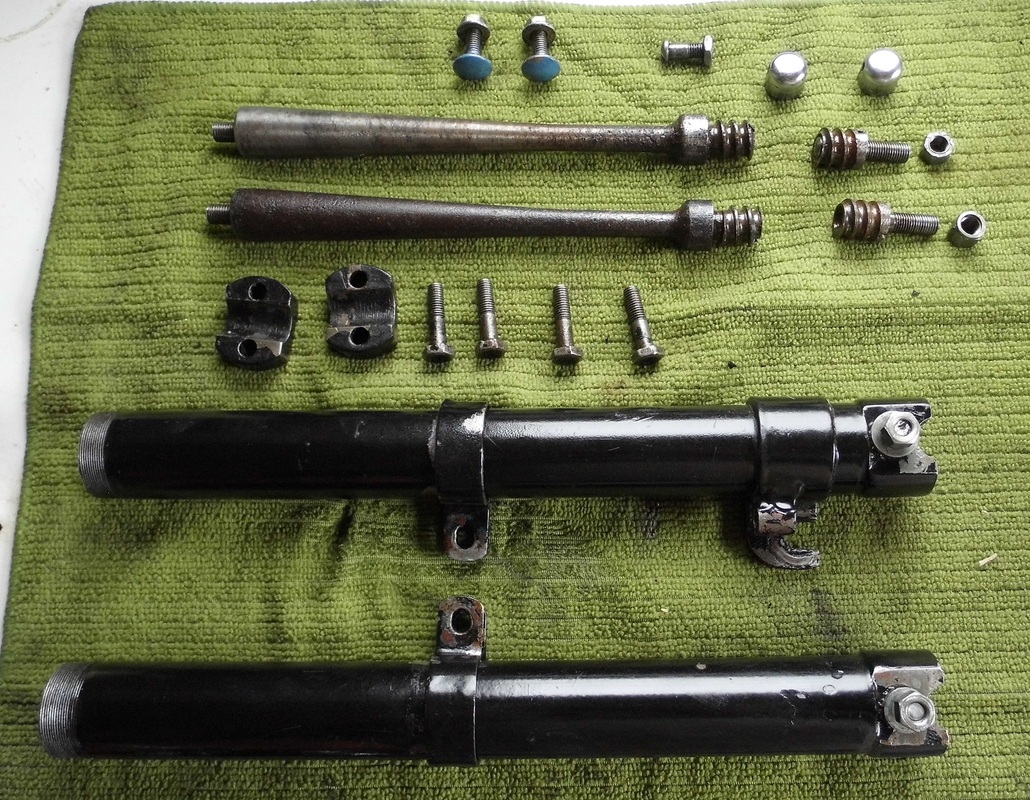
Row 1: two mudguard clip nuts and bolts; one brake cam lever bolt; two top nut caps.
Row 2: restrictor rod; spring anchorage; top nut.
Row 3: restrictor rod; spring anchorage; top nut.
Row 4: two sliding tube end caps; four bolts.
Row 5: sliding tube,RH, with mudguard clip.
Row 6: sliding tube,LH, with mudguard clip.